How to Hang Curtains: Rod Height, Width and Brackets
How high to hang a curtain rod, how far past the frame it should run, how many brackets and center supports it needs, and how to mount them so they hold.
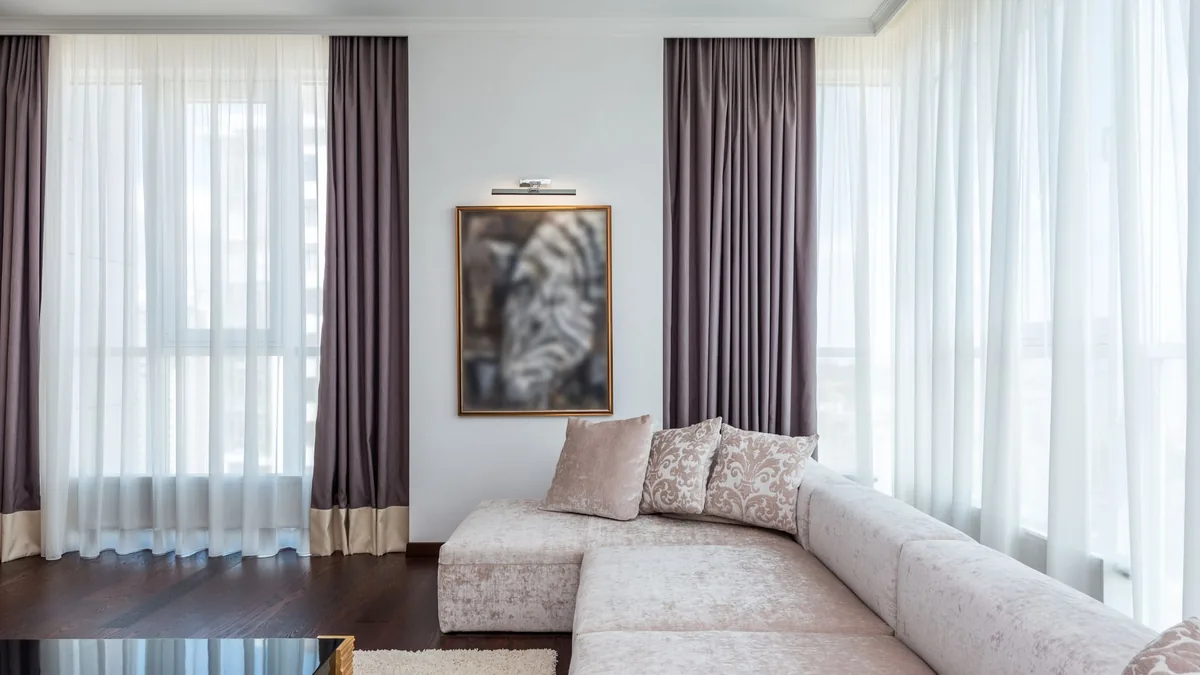
The rod goes up right on top of the window frame, the panels stop short of the floor, and when you pull them open they still cover the edges of the glass. One easy slip is drilling the brackets before checking which panel length that height leaves you: two rod makers’ guides start about 4 inches above the frame and past it on both sides, and a stock length has to work from there. Below is the job in the order you do it: decide the height, decide the width, work out the brackets, mount them, then hang and dress the panels.
The short answer
| Step | What to decide | Figures from makers’ guides |
|---|---|---|
| Height | How far above the frame | About 4 in (Kenney, Umbra); a minimum of 4–6 in if space allows (Half Price Drapes); 6 in to make the window look larger (Kenney); or halfway between frame and ceiling (Umbra) |
| Length | Which panel length fits | Top of rod to floor for pocket and tab panels, plus any heading above the rod; bottom of ring to floor for rings |
| Width | How far past the frame | Brackets 1–3 in out each side generally, 6 in for a larger look (Kenney); rod size = window width + 8 in (Umbra) |
| Brackets | When to add a center support | Brackets 84 in or more apart (Kenney decorative rods); rods over 50 in (Kenney traverse rods); brackets over 60 in apart, or a support every 30 in on its other pages (Kwik-Hang) |
| Fixing | What goes into the wall | Screws into studs or wood trim; anchors into hollow drywall |
How high should the curtain rod go?
Two decisions set the height: how far above the frame the brackets go, and which curtain length that height leaves you.
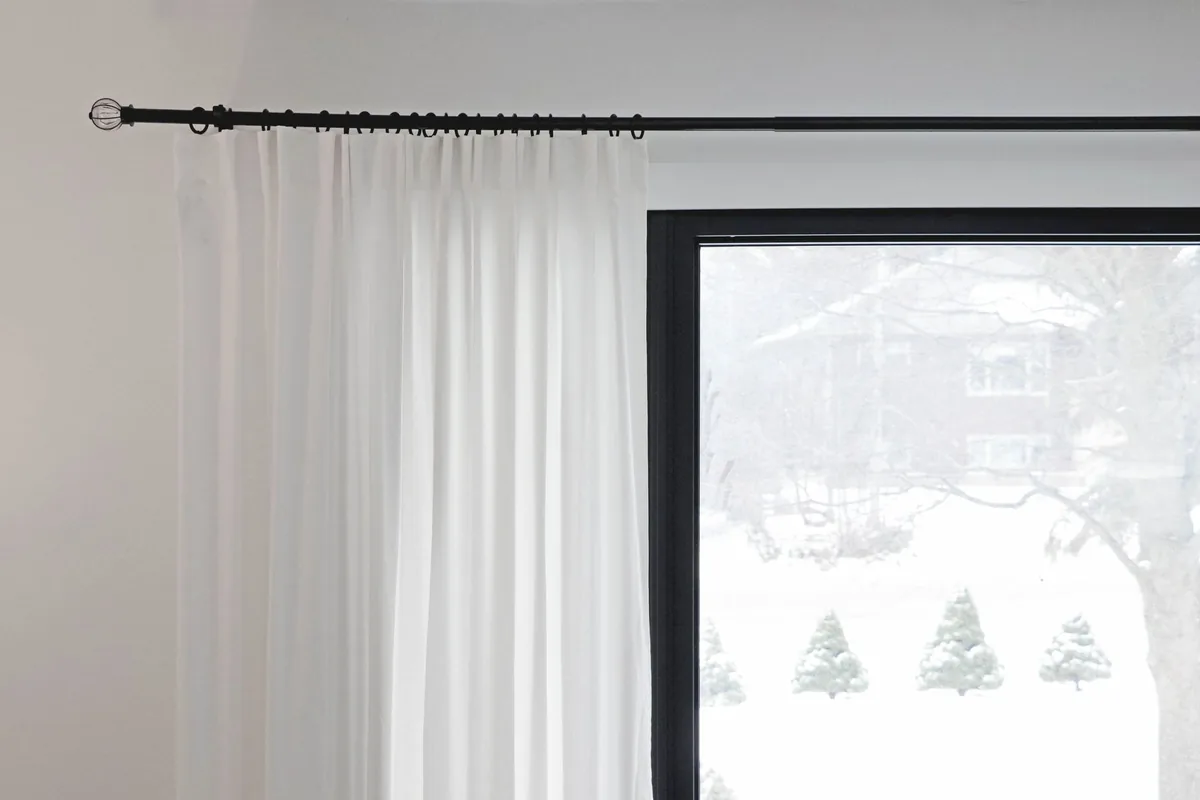
Above the frame. Brackets are generally mounted 4 inches above the window casing on one rod maker’s window guide, and 6 inches above the frame to make a window appear larger. On another rod maker’s guide, the rod goes about 4 inches above your window frame, or halfway between the frame and the ceiling. On a curtain seller’s measuring guide, the recommended minimum is 4 to 6 inches above the window trim, if space allows. So 4 inches is a starting point in all three of these guides (our reading); 6 inches is Kenney’s figure for making a window look larger, and halfway to the ceiling is Umbra’s alternative. One retailer’s guide goes higher: the rod can hang anywhere from a few inches above the trim to a few inches below the ceiling. A higher rod needs a longer panel, which curtain length (linked below) works through.
Then check the length against the height. Curtain length is measured from the rod, so the rod height decides which panel fits. On that curtain seller’s guide, length for pocket, tab-top and back-tab panels runs from the top of the rod to the floor; for panels on rings or a traverse rod’s carriers it runs from the bottom of the ring. The standard curtain lengths on one bracket maker’s list are 63, 84, 96, 108 and 120 inches, and the same guide warns that forgetting the rod and brackets when measuring can leave curtains longer than expected. Work backwards (our suggestion): on that seller’s measuring rule, for an 84-inch pocket panel to reach the floor, the top of the rod sits 84 inches up; take off any heading that stands above the rod (see curtain length); on rings, the bottom of the rings sits there, so the rod itself goes higher by the depth of the ring (our arithmetic). If the height a stock length needs comes out less than 4 inches above your frame, go to the next length up and set the rod for it, or plan to hem (our suggestion). Which length and finish (floating, just touching or puddling) suits the room is covered in curtain length.
How wide should the rod be?
The width decides whether open curtains clear the glass or sit over its edges. The guides give their figures in different ways, some per side and some for the whole rod:
| Guide | Figure (bracket position or rod size) | What it is for |
|---|---|---|
| Kenney window guide | Bracket position: 1–3 in out from each side of the trim; 6 in from each side to make the window look larger | Where the brackets go |
| Kenney traverse rod instructions | Bracket position: outside and above the casing; distance between brackets = combined width of the two panels minus 12 in (4 in for each return, 4 in for the center overlap) | Full window exposure when the draperies are open |
| Umbra | Rod size: window width + 8 in (frame included); allow up to 8 in more wall space for finials and wall clearance | Choosing the rod size; room for the finials |
| Rod Desyne | Rod size: 3–6 in of extra rod beyond the window width (the page doesn’t split it per side) | Stops light passing at the sides |
| Kwik-Hang how-to page | Rod size: 8–12 in wider than the window | Covering the sides of the window |
| Kwik-Hang rod-length guide | Rod size: 6 in added to each side of the frame, or 20% added | Room for the open curtains |
The two Kwik-Hang pages part on wide windows: 20% of a 100-inch window is 20 inches, outside the 8–12 range (our arithmetic).
Make room for the open curtains. The extra rod clears the glass only if the open panels fit on it. Adding six inches each side, or 20%, is one bracket maker’s suggestion, so that open curtains, the stack back, don’t engulf the whole window. To size it for your own panels (our suggestion): gather one panel the way it will sit when open, measure how wide the bunch is, and set the bracket at least that far past the frame. Kenney’s traverse rule works from the panels too: two 50-inch panels put the brackets 88 inches apart (our arithmetic: 100 − 12).
Count the finials. On one rod maker’s sizing tips, the true length of the whole set is the rod plus the width of a finial at each end. Check there is wall for it beside the frame, clear of a corner, a light switch or the next window (our suggestion).
How many brackets does the rod need?
Each rod here sits on a bracket or support at each end. What changes with length is the center support, which stops the middle of the rod sagging. The rules differ from rod to rod, so follow the one printed for yours:
| Rod | Center support | Where it comes from |
|---|---|---|
| Kenney decorative rod, single or double (42–120 in) | None below 82 in between brackets; a third bracket at the center from 84 in | Kenney instruction sheets |
| Kenney traverse rod | Included for sizes greater than 50 in | Kenney instruction sheet |
| Kwik-Hang tap-in brackets | One once the brackets are more than 60 in apart (product page); by window width, none up to 60 in, one from 61 to 120 in, two above 120 in (heavy-curtain guide) | Kwik-Hang product page and heavy-curtain guide |
| Umbra Cappa rods | Included; installing it is required, including for the 22 lb rating | Umbra product pages |
On the Kenney decorative rod sheet, if your bracket marks come out between 82 and 84 inches apart, you move them out to 84 and fit the third bracket. Kwik-Hang’s own pages differ: besides the two rules in the table, its guide to extra-long rods (over 120 inches) and its double-rod guide put a support every 30 inches. If you can’t tell which applies, the 30-inch spacing gives the most supports of the three (our reading). A single support goes at the midpoint between the end brackets, where Kenney’s traverse rod sheet has you mark it with a tape measure; with more than one, space them evenly (our suggestion).
Check the weight. Weigh the curtains and compare the total with the rod’s or brackets’ rating: 22 lb for the Umbra rod below with its center support, 20 lbs for a pair of Kwik-Hang’s tap-in brackets, 25 pounds for Kenney’s Twist & Fit. On one bracket maker’s heavy-curtain guide, a pair of medium-weight blackout panels can top 10 pounds. For thickness, Kenney’s guide matches 5/8-inch rods to light to medium weight curtains, 3/4-inch to medium or heavyweight, and 1-inch to heavyweight thermal or room-darkening curtains.
If you are buying the rod now. The Umbra Cappa Curtain Rod is a 1-inch adjustable rod sold in 36–66, 66–120 and 120–180 inch sizes, with brackets, a center support bracket, screws and drywall anchors in the box. Installing the included center support is required, and the 22 lb (10 kg) rating depends on it. Umbra describes its rods as built for light-to-medium weight curtains, so for heavy thermal drapes look at a rod rated for more (our suggestion). $28.00 for the 36–66 inch size at 11 October 2026 prices (price for reference only). Its brackets are wall-mount only, so it won’t do for a ceiling mount.
How do you mount the brackets so they hold?
Studs or anchors. Check what is behind each mark with a stud finder before you drill. A bracket over a stud or wood trim takes screws only; over hollow drywall it needs an anchor. The rod instructions here give these hole sizes:
- Into a stud or wood trim: a 1/8-inch pilot hole on Rod Desyne’s installation sheet, a 5/32-inch pilot on Kenney’s decorative rods, with screws only.
- Into hollow drywall: 3/16-inch holes for plastic anchors on Rod Desyne’s sheet. On Kenney’s sheets, the drill bit is matched to the anchor tip and the anchor tapped gently until it is flush with the wall.
Don’t overdrive the screws; Rod Desyne’s sheet says “just snug is best.”
How much an anchor holds. TOGGLER’s data sheets list ultimate loads and, citing industry safety standards, recommend using only a quarter of them as the maximum load per anchor. For its SnapSkru SP Regular with a #8 x 1-1/2-inch screw, the data sheet lists 149 lb in shear and 79 lb in tension in 1/2-inch drywall; a quarter is about 37 lb and 20 lb (our arithmetic). Those figures are for that anchor only: the rod sheets read here give hole sizes for their own anchors, not loads. On the same maker’s plastic toggle data sheet, holding strength varies inversely with the distance of the load from the wall, and a bracket holds the rod out from the wall (our reading). Put brackets for heavy curtains into studs where you can (our suggestion).
Tools. Umbra’s list is a tape measure, a screwdriver and a drill. Kenney’s traverse rod sheet adds a 1/8-inch drill bit, a pencil and scissors; Kwik-Hang’s adds a level and a stud finder.
Press the panels first. One curtain seller’s installation page recommends having them professionally pressed to remove creases from packaging and shipping, or you may iron them front and back on the right fabric setting.
The installation sequence. The steps follow Kwik-Hang’s drilling steps and the rod makers’ sheets linked above; the parts marked (our suggestion) are ours.
- Mark the bracket positions. Pencil a mark above each side of the frame at the height from the first section. For the distance out, Kenney’s per-side figures and its traverse rule are bracket positions; the whole-rod figures tell you which rod size to buy, so halve the extra, set each bracket a little inside that so the rod and finial run past it, and check the rod’s adjustable range covers the span (our suggestion). Measure the height from the top of the frame, then check across with a level; if the two disagree, follow the level (our suggestion).
- Mark the first bracket. Hold the bracket centered on one mark, check it with a level, and pencil the screw holes.
- Check for a stud behind the holes.
- Drill the pilot holes at the size on your rod’s own sheet for what is behind them: wood, or its anchor.
- Fit the anchors in drywall holes, tapped in flush.
- Screw the bracket on, snug rather than tight.
- Level and mount the other bracket. Rest the rod in the first bracket, level it across to the far side, mark the second bracket there, and repeat steps 2 to 6.
- Fit the center supports, if your rod needs them. One goes at the midpoint between the end brackets (Kenney’s traverse sheet). If your rule calls for more than one, space them evenly between the end brackets (our suggestion), no more than 30 inches apart if you follow Kwik-Hang’s 30-inch pages.
- Hang the rod. Slide pocket, tab or grommet panels onto the rod, lift it into the brackets and tighten the locking screws by hand until finger tight, so the rod can’t move. A traverse rod snaps into its brackets instead, and the pleats are hooked onto its carriers afterwards (see “How do you hang and dress the panels?” below).
- Test it. Gently tug on the ends of the curtains to test the brackets.
What if you can’t drill, or want a different setup?
Inside the frame: tension rods
Tension rods install inside the window frame with no tools, and on one rod maker’s guide they are ideal for dorm rooms or apartments. On its tension rod sheet, you thread the curtain on, place the rod inside the window casing and extend it until the end pads touch each side, then grip both parts of the rod and turn your right hand toward you to tighten. Kenney’s Twist & Fit rod, which combines a tension rod with the look of a decorative rod, holds up to 25 pounds. In one bracket maker’s view, tension rods aren’t durable enough for heavier curtains. Mounted inside the frame, the open curtains stay over the edges of the glass (our reading).
On wooden trim: tap-in brackets
Kwik-Hang Single Curtain Rod Brackets tap into the top corners of wooden window trim with a hammer or by hand, with no screws in the wall. They are sold as a pair and support up to 20 lbs on the product page (its heavy-curtain guide says 20 pounds per bracket; the pair figure is the cautious one, our reading). They come in versions for 5/8-inch and 1-inch rods and project 3 inches from the trim. The trim must be between 1/2 inch and 1 inch wide, and they are not recommended for hardwoods like oak, crown molding, MDF or metal trim; the heavy-curtain guide adds PVC to that list. If the brackets are more than 60 inches apart you need a center support bracket as well. $12.99 for the pair at 11 October 2026 prices (price for reference only). The catch is height: the brackets sit at the corner of the trim, so the 4 inches above the frame from the first section isn’t available (our reading).
On the ceiling
You need hardware made for it: Umbra’s included brackets are wall-mount only. A Kenney traverse rod can be mounted directly to the ceiling through the holes on top of its pulley cases, without the left and right brackets, and toggle bolts (not included) are recommended for that. Rod Desyne’s white traverse rods also convert to a ceiling mount. Length is still measured from the rod as in the first section (our reading).
Two layers: double rods
Double or triple rods are for a layered treatment, on Kenney’s guide. On Kwik-Hang’s double rod steps, sheers go on the 5/8-inch rod in the smaller brackets and drapes on the 1-inch rod in the larger ones, and the hardware should be strong enough for two sets of draperies. Kenney’s double decorative rod uses the same bracket rule as its single rod: a third bracket at the center from 84 inches between brackets. Umbra’s Cappa Double rod is rated to 22 lbs, and installing its included center support is required.
Over blinds or deep trim
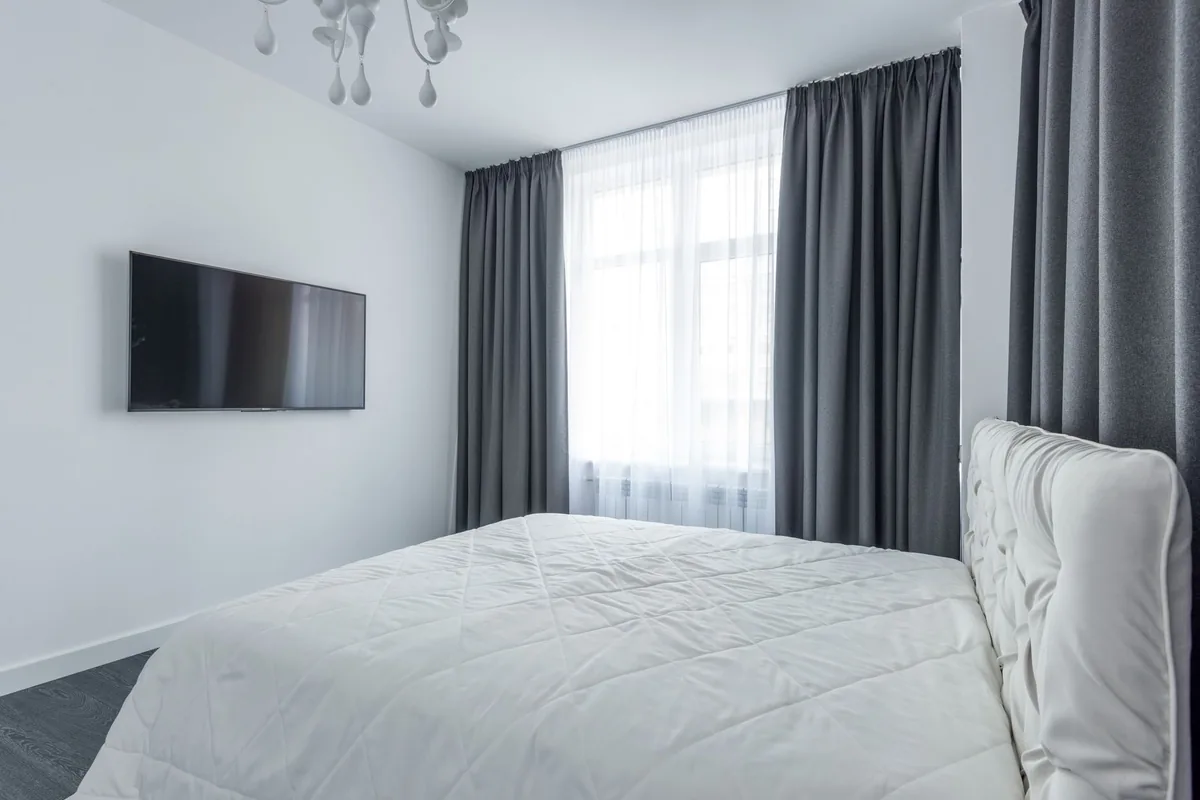
On one bracket maker’s guide, brackets should extend past the window molding so the curtains hang properly, and rod-pocket curtains need less depth than grommet curtains. Kenney’s 3-inch clearance rods can be used over mini blinds or shades; clearance is the distance from the mounting surface to the inside of the rod. Measure how far your blind or trim sticks out before you buy (our suggestion).
How do you hang and dress the panels?
Put them on the rod. On the curtain seller’s installation page:
- Pocket and back-tab panels slide straight onto the rod, through the pocket or through the tabs for a pleated look. To use rings instead, push a drapery pin into the back of the panel, not through to the face, and hook it to the ring.
- Pleated panels need drapery rings and hooks. Push the spaces between the pleats forward on a traverse rod and to the back on a decorative rod, so the draperies stack easily when drawn open.
Grommet panels go straight onto the rod through the grommets (our reading); Umbra’s rods are made to work with them.
On Kenney’s traverse rods, the pins go 1.5 inches below the top of the drapery, and extra carriers can cause jamming, so count the pleats and remove the spare carriers. Hooking the last pleat into the bracket hole covers the side of the bracket.
Train the folds. On the same page, draperies are trained after hanging: draw them open, arrange the folds evenly from top to bottom, and loosely tie strips of fabric around them for at least three days to set the folds.
If the room needs a rug as well, our guide to area rugs covers sizes room by room, and more measuring guides for curtains, lamps and wall art are collected under rugs and decor.
Where these numbers come from
Heights, widths and bracket rules come from Kenney’s window guide and instruction sheets, Umbra’s curtain rod guide, Rod Desyne’s instruction sheets, Kwik-Hang’s guides, Half Price Drapes’ measuring and installation pages and one retailer’s measuring guide; anchor loads are from TOGGLER’s data sheets, all read on 11 October 2026. Prices are from each brand’s product page on the same date, with no code applied. The bracket spacing, width comparison and quarter-of-ultimate anchor figures marked as our arithmetic are our own sums from those figures.
Frequently asked questions
How high should I hang curtains?
Start about 4 inches above the window frame: Kenney and Umbra both give 4 inches, and Half Price Drapes recommends a minimum of 4 to 6 inches above the trim if space allows. To make a window look larger, Kenney's guide goes to 6 inches above the frame; Umbra's alternative is halfway between the frame and the ceiling. One retailer's guide goes higher, as far as a few inches below the ceiling (see curtain length). Then choose a curtain length that fits the height, measured from the rod.
How do you hang curtain rods on drywall?
Check each bracket mark with a stud finder first. Where there is a stud, screw straight in through a pilot hole (1/8 inch on Rod Desyne's instructions, 5/32 inch on Kenney's decorative rods). Where there is only drywall, drill the hole for the anchor (3/16 inch for plastic anchors on Rod Desyne's sheet), tap the anchor flush, then screw the bracket on snug, not overtight.
How wide should a curtain rod be?
Wider than the frame on both sides. Kenney generally puts brackets 1 to 3 inches out from each side of the trim, or 6 inches to make the window look larger; Umbra sizes the rod at the window width plus 8 inches and says to allow up to 8 inches more for finials and wall clearance. If you want open curtains to clear the glass, measure how wide one panel bunches up and put the bracket at least that far past the frame (our suggestion).
How many brackets does a curtain rod need?
One at each end, plus center supports on longer rods, and the rule depends on the rod. Kenney's decorative rods add a third bracket at the center once the end brackets are 84 inches or more apart; its traverse rods include a center support above 50 inches. Kwik-Hang's pages give three rules for its trim brackets: a support once the brackets are more than 60 inches apart (product page); one support for windows 61 to 120 inches wide and two above 120 inches (heavy-curtain guide); and a support every 30 inches (its extra-long and double-rod guides).
How do you hang curtains without drilling?
Use a tension rod inside the window frame, twisted until its ends press on both sides of the casing, or tap-in brackets on wooden trim. Kenney's Twist & Fit tension-style rod holds up to 25 pounds; Kwik-Hang's tap-in brackets hold up to 20 pounds (per pair on the product page, per bracket in its heavy-curtain guide) on wooden trim 1/2 to 1 inch wide, and are not recommended for oak, PVC, MDF, crown molding or metal trim.
- #curtain rods
- #curtain installation
- #window treatments