How to Make a Raised Garden Bed From Wood or Metal
Build a raised garden bed step by step: pick the size and spot, choose wood or a metal kit, follow a 4x8 cut list, then work out how much soil to buy and mix.
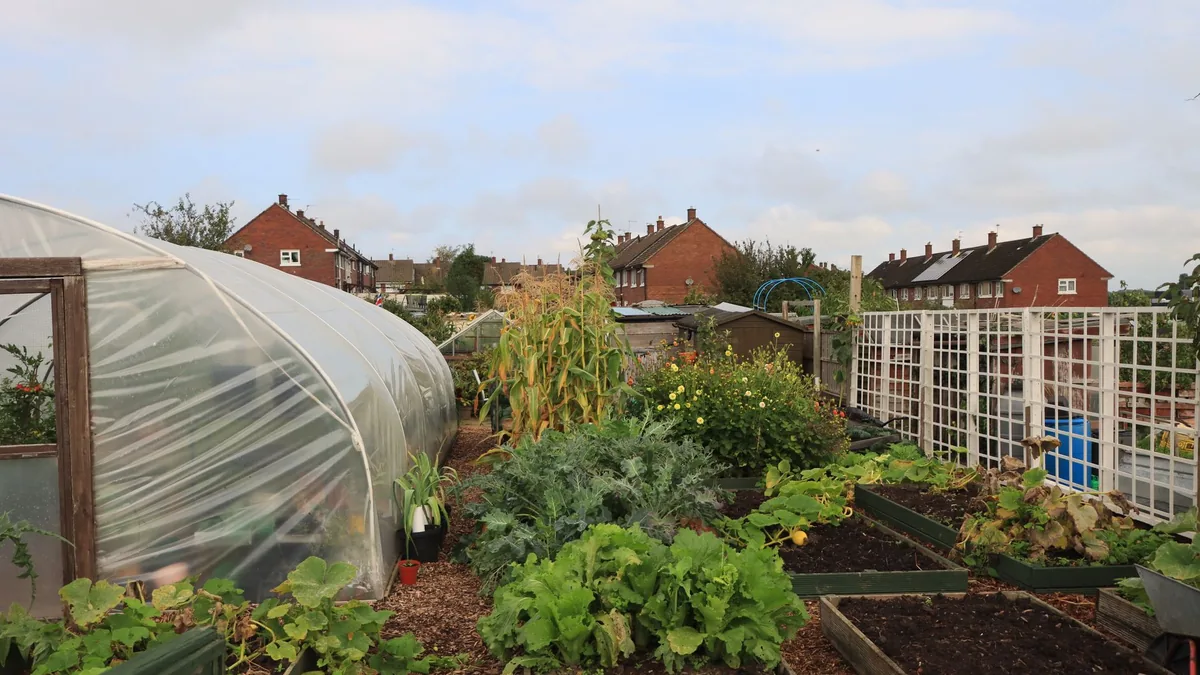
You bought a stack of boards and a few bags of soil, and the bed came out too wide to reach the middle, sitting in afternoon shade, and half full. The mistakes happen before the first screw: the spot, the width and the volume of soil are decided by numbers you can work out at the kitchen table, such as the 3 to 4 feet of width that lets you reach the middle from both sides. Below are the steps in the order you build: choose the spot and size, choose wood or metal, decide what goes under the bed, build a 4 by 8 foot wooden bed from a cut list or put a metal kit together, then buy and mix the soil.
The short answer
| Step | What to do |
|---|---|
| 1. Spot and size | At least 6 to 8 hours of sun for tomatoes and peppers. 3 to 4 ft wide if you can reach from both sides, 3 ft if only one. At least 6 to 12 in deep |
| 2. Material | Cedar or redwood resist rot; untreated pine or fir is cheap but rots within a few years; copper-treated lumber should be labeled for ground contact. A metal kit is another choice. No old lumber or railroad ties |
| 3. Bottom | Open bottom on soil; hardware cloth against mice and chipmunks; landscape fabric, not plastic, on a patio. Fabric goes down before the frame; hardware cloth after you level and mark the frame, before staking |
| 4. Build | Wood, on soil: six 2x6 x 8 ft, one 4x4 x 4 ft, one 2x4 x 8 ft, 32 exterior screws at 3 in and 8 at 2½ in. Metal kit: follow its manual, wearing gloves; on a patio, a 17 in kit on landscape fabric |
| 5. Soil | Length x width (ft) x depth (in) / 12 = cubic feet; / 27 = cubic yards. Half to two thirds topsoil, the rest compost; top up each year |
Where should the bed go, and how big should it be?
Sun and water first. For full-sun crops such as tomatoes, peppers and eggplants, put the bed where it gets at least 6 to 8 hours of sunlight a day, and near a water supply. A spot with less than a few hours of sunlight (part to full shade) can still grow lettuce, baby kale, scallions, radishes and beet greens. Raised beds dry out faster than the ground, and the taller the bed, the more often you will water it.
Width: reach the middle without stepping in. Stepping into the bed compacts the soil, so size it to your reach. Four feet is a convenient width when you can get at both sides, and 3 feet is the limit if the bed backs onto a fence or wall, because most gardeners find reaching farther than 3 feet uncomfortable.
Length: shorter beds are sturdier. Length is up to your yard, but break a long run into shorter beds with a path between. With boards for sides, those 6 feet long or less are less likely to warp or break than longer ones, and several small beds make crop rotation easier. Leave paths about 1 foot wide for walking, or 2 to 3 feet where a wheelbarrow has to pass, keeping in mind that plants spill over the edges.
Height: deeper is better, up to a point.
- Most vegetables need at least a 6 to 12 inch rooting zone, and deeper is better. Beds shallower than 12 inches should have no bottom, so roots can reach the soil below.
- On pavement or another very hot spot, raising the bed one or two feet can help reduce heat.
- Beds taller than 18 to 24 inches need retaining walls with foundations and supports, which is a different project from the one here.
Which material: wood, treated lumber or a metal kit?
| Material | How long it lasts | For food crops |
|---|---|---|
| Untreated pine or fir | Low cost; rots within a few years | No treatment chemicals |
| Cedar or redwood | Costs more; rot-resistant, lasts longer | No treatment chemicals |
| Modern pressure-treated (copper-based) | Economical and long-lasting | Ground-contact lumber; liner advice ranges from “should” to “consider” (see below) |
| Galvanized or coated steel | Generally costs more than wood, can last longer | Zinc may leach in highly acidic soil, below pH 5 |
| Old lumber, railroad ties | Avoid | May be CCA-treated or carry industrial preservatives |
Untreated lumber such as fir breaks down within a few years. Cedar and redwood are naturally rot-resistant: more expensive than pine or fir, but longer-lasting.
Pressure-treated lumber today is mostly copper-based. The arsenic preservative CCA (chromated copper arsenate) was voluntarily discontinued for homeowner uses in December 2003, so warnings about arsenic apply to old wood, not new (our reading). The most common preservatives for lumber now are copper-based: copper azole (CA-C), micronized copper azole (MCA) and alkaline copper quaternary (ACQ). In one Oregon State University study, soil copper rose only within 1 inch of the copper azole boards, and the vegetables and herbs grown in the beds showed no increase in copper over four growing seasons; the researchers scoped their conclusion to Willamette Valley gardeners. If you use treated lumber:
- buy boards whose end tag says they are treated for ground contact and with a preservative approved for residential use;
- paint every cut end with a cut-end wood preservative;
- consider lining the inside walls: the Utah guide says a plastic barrier should go between treated lumber and the soil; the Missouri guide suggests a heavy plastic liner if you are uncertain about the lumber; the Minnesota guide says to consider lining the edges to reduce copper leaching;
- don’t burn the offcuts at home: burning CCA or other preservative-treated wood in a residential setting is advised against, to avoid possibly breathing toxic chemicals in the smoke and ash.
Don’t reuse old lumber or railroad ties. Wood more than about 20 years old may be CCA-treated, and the industrial preservatives in railroad ties are not intended for garden or residential use.
Metal sides generally cost more than wood but can last longer. Galvanized steel typically comes in 24-inch panels, a good depth for a bed. Zinc from the coating may leach into the soil in highly acidic soils, below pH 5; a soil test tells you where yours stands (our suggestion). If zinc is a concern, add a liner or choose stainless steel. Some prefabricated metal beds sold online have been found to contain lead, so buy from a seller that states what the panels are made of (our suggestion).
What goes under the bed: nothing, hardware cloth or a liner?
Usually nothing. In most cases you don’t need a barrier between the bed’s soil and the ground, and a barrier is likely to stunt root growth. Killing the vegetation and loosening the soil, as in step 1 of the wooden build below, is the preparation on soil. Cardboard left under the bed can stop water soaking through until it breaks down.
Hardware cloth against burrowers. If mice or chipmunks dig in your garden, put hardware cloth across the bottom of the bed to reduce the chance of them tunneling up into it. It goes down after the frame is levelled and before it is staked: see steps 5 to 7 of the wooden build.
A liner on a patio or pavement. Where the bed stands on a hard surface, a liner along the bottom may help keep the soil in. Choose one water can pass through, such as landscape fabric, not plastic sheeting, and lay it before the frame.
How do you build a 4 by 8 foot wooden bed?
This example uses two 2x6 boards stacked on each side, so the bed is 11 inches deep, inside the 6 to 12 inch range above. A dried, surfaced 2x6 measures 1½ by 5½ inches and a 4x4 measures 3½ by 3½ (our reading of the sizes on that page), and the numbers below assume them; measure your own boards before you cut (our suggestion). Lumber is readily sold in 4-foot multiples, so a 4 by 8 foot bed needs little sawing.
This build is for open soil or lawn, not a patio. On pavement the bed is all the soil the roots get, and beds shallower than 12 inches should have no bottom so roots can reach the soil below; raising a bed there by one or two feet can also help reduce heat. So an 11-inch wooden bed is too shallow on a hard surface (our reading). For a patio, the 17-inch metal kit below is one option, set on landscape fabric laid first (our suggestion); a third course of 2x6 boards would make this wooden bed 16½ inches deep (our arithmetic), but the cut list here covers only two.
| Buy | Cut into | Used for |
|---|---|---|
| 4 boards, 2x6 x 8 ft | Leave whole (96 in) | The two long sides, two boards high |
| 2 boards, 2x6 x 8 ft | Two 45 in pieces from each | The two short sides, two boards high |
| 1 post, 4x4 x 4 ft | Four 11 in pieces | Corner posts inside the corners |
| 1 board, 2x4 x 8 ft, cedar, redwood or ground-contact treated | Two 22 in stakes | One stake at the middle of each long side |
| 32 exterior screws, 3 in | Two per board end at each post | |
| 8 exterior screws, 2½ in | Two per board at each stake |
The short sides are 48 inches minus the two 1½-inch long boards they fit between, or 45 inches, so the bed measures about 4 by 8 feet outside and about 45 by 93 inches inside. The posts are 11 inches, two 5½-inch boards, so they don’t stick up above the top edge. The post screws are 16 board ends times 2, or 32. A stake laid flat is 1½ inches thick, so a 3-inch screw through a 1½-inch board into it would reach its far face; 2½-inch screws leave half an inch to spare (all our arithmetic).
Tools (our list): a saw, a drill or driver with a bit to match the screws, a tape measure, a framing square, clamps, a level, a spade or broadfork, a brush for cut-end preservative if the lumber is treated, a mallet or small sledge for the stakes, and tin snips if you are laying hardware cloth.
Screws: this bed follows a fastener maker’s post design, which uses 3-inch timber screws: 1½ inches through the board and 1½ into the post (our arithmetic). Use screws made for outdoor lumber, not interior drywall screws (our suggestion).

- Prepare the ground. Mark the 4 by 8 footprint first with string and pegs or a spade line (our suggestion). Kill the grass or other plants where the bed will go, take off any tarp or cardboard you smothered it with, and loosen the top layer with a broadfork or spade. Till the soil under the bed 6 to 12 inches deep, but leave about a foot of firm, unloosened ground at the middle of each long side, where the stakes will go (our suggestion). Level the area so the frame sits flat.
- Cut the pieces on the cut list, and cut a point on one end of each stake (our suggestion). Before you cut, look at the end of each board and set it heartwood in, the side that grew nearer the center of the tree facing the inside of the bed, so that if the board warps, it bows slightly outward at the middle. If the lumber is treated, paint the cut ends with cut-end preservative now.
- Build the two short ends. Stand two 11-inch posts on a flat surface, lay two 45-inch boards across them, one above the other, and set the posts just inside the board ends, each post’s outer side flush with the end of the boards. Clamp, then drive two 3-inch screws through each board into each post (our suggestion; the fastener maker’s plan also fixes the short sides first).
- Add the long sides. Stand the two ends up about 8 feet apart, posts facing in. Clamp the two 8-foot boards, one above the other, across each pair of posts so their ends sit flush with the outside of the short boards, and drive two screws through each board into each post. Check that the corners are square with the framing square before the last screws go in (our suggestion).
- Set it in place and level it. Lay a level along each side and across the corners, and scrape soil away or pack it under the boards until the frame sits level and every board touches the ground. Then mark the outline on the ground with the spade (our suggestion).
- Add hardware cloth, if you are using it. Lift the frame off, lay cloth cut to the full 4 by 8 outline so it runs under the boards, overlapping strips if the roll is narrower, and set the frame back on its marks. Cut a slot in the cloth where each stake will go (our suggestion).
- Stake the long sides. An 8-foot side is longer than the 6 feet past which boards warp more easily, so set one stake inside the middle of each long side (our suggestion). Make the stakes twice the height of the bed, of decay-resistant wood, each buried halfway in firm ground, and fix them inside the boards so the soil hides them. For this bed that is 22 inches, 11 in the ground. Lay each stake flat against the boards, drive it in with the mallet, and fix it with two 2½-inch screws through each board (our arithmetic and suggestion). Use cedar, redwood or ground-contact treated lumber for the stakes, not untreated pine (our suggestion).
If you are lining the walls, fix the liner to the inside of the boards before any soil goes in (our suggestion). For a seat, cap the walls with a 2x6 or 2x8 board.
How do you put a metal raised bed kit together?
Each kit has its own parts, so follow its manual. As an example, the Vego Garden 17” Tall Modern 4’ x 8’ Metal Raised Garden Bed is a galvanized steel bed with a powder-coated finish, 4 feet wide, 8 feet long and 17 inches tall, with an open bottom. The maker says the coating has passed applicable food-contact safety testing. It costs $250 at 11 October 2026 prices (price for reference only). Assembly needs only standard household tools, and a power drill makes it faster. The bolts, a hex key, a socket wrench, a power hex driver bit and a pair of gloves come in the box, itemized in the assembly manual’s parts list.
Safety first. The panels may have sharp metal corners and edges: wear gloves, closed-toe shoes and long pants while handling them, and work on a stable, clean surface away from children and pets.
The manual’s assembly steps for the 4 by 8 foot size, in order:
- Push a cap into the top of each corner post and center post.
- Bolt one long side together: corner post, panel, center post, panel, corner post, with six bolts at the center post and three at each corner post, 12 per long side (our count from the manual’s diagram and its 36-bolt parts list). Keep the capped ends of all the posts facing the same way, and the side of each center post with holes facing the inside of the bed.
- Bolt a short-side panel to one corner post of that long side, with three bolts.
- Turn the L-shaped section upright on a flat, level surface with the caps on top, then repeat steps 2 to 4 for the other half.
- Bolt the two halves together at the two open corners.
- Join the three bracing frames into one with the longer bolts and nuts, tighten them with the hex key and socket wrench, and bolt the frame between the two center posts. The 2 by 4 and 4 by 4 foot sizes have no brace.
Put it together where it will stand (our suggestion). On soil, prepare the ground as in step 1 of the wooden build (no stake patches needed), level the bed, mark its outline, and lift it off to lay any hardware cloth before setting it back. On a patio, lay landscape fabric first, covering the full footprint and a little larger (our suggestion).
How much soil do you need, and what should go in it?
Work out the volume. Multiply length by width in feet, multiply by the depth in inches and divide by 12 to get cubic feet; divide cubic feet by 27 to get cubic yards (our arithmetic: a cubic yard is 3 by 3 by 3 feet).
- The 4 by 8 wooden bed above: 4 x 8 x 11 / 12 = about 29 cubic feet by its outside size. Inside the boards it is about 45 by 93 by 11 inches, about 26 cubic feet, so buy a little over a cubic yard, or keep a few bags back for topping up (our arithmetic and suggestion).
- The 17-inch metal bed: 4 x 8 x 17 / 12 = about 45 cubic feet, the same as the soil capacity its maker lists, approximately 45 cubic feet or 1.7 cubic yards.
Buying in bulk by the cubic yard is generally much cheaper than buying bags. If you buy bags, divide the bed’s cubic feet by the cubic feet printed on each bag (our suggestion).
Choose the mix. The two extension guides here give similar ratios:
- About 2/3 to 1/2 topsoil and 1/2 to 1/3 plant-based compost, ideally loam or sandy loam topsoil; add some sand if the topsoil has a lot of clay. For the wooden bed’s 26 cubic feet that is about 13 to 17 cubic feet of topsoil and 9 to 13 of compost (our arithmetic).
- Native topsoil amended with 30 to 50% compost by volume, or equal parts compost, a drainage material such as coarse sand, perlite or vermiculite, and topsoil.
Potting soil on its own dries out too quickly for a raised bed in the Minnesota guide. Manure and composted manure are high in phosphorus and should be used sparingly, only when a soil test shows the bed needs more.
Mix, don’t layer. Distinct layers of soil create barriers that water doesn’t readily soak through and roots don’t easily grow through, so on open soil mix the new soil into the loosened ground. Over hardware cloth or on a patio there is no ground to mix into, so blend the topsoil and compost thoroughly on a tarp or in a wheelbarrow before it goes in (our suggestion). Fill to the top, water it in, and top up from the extra where it sinks (our suggestion).
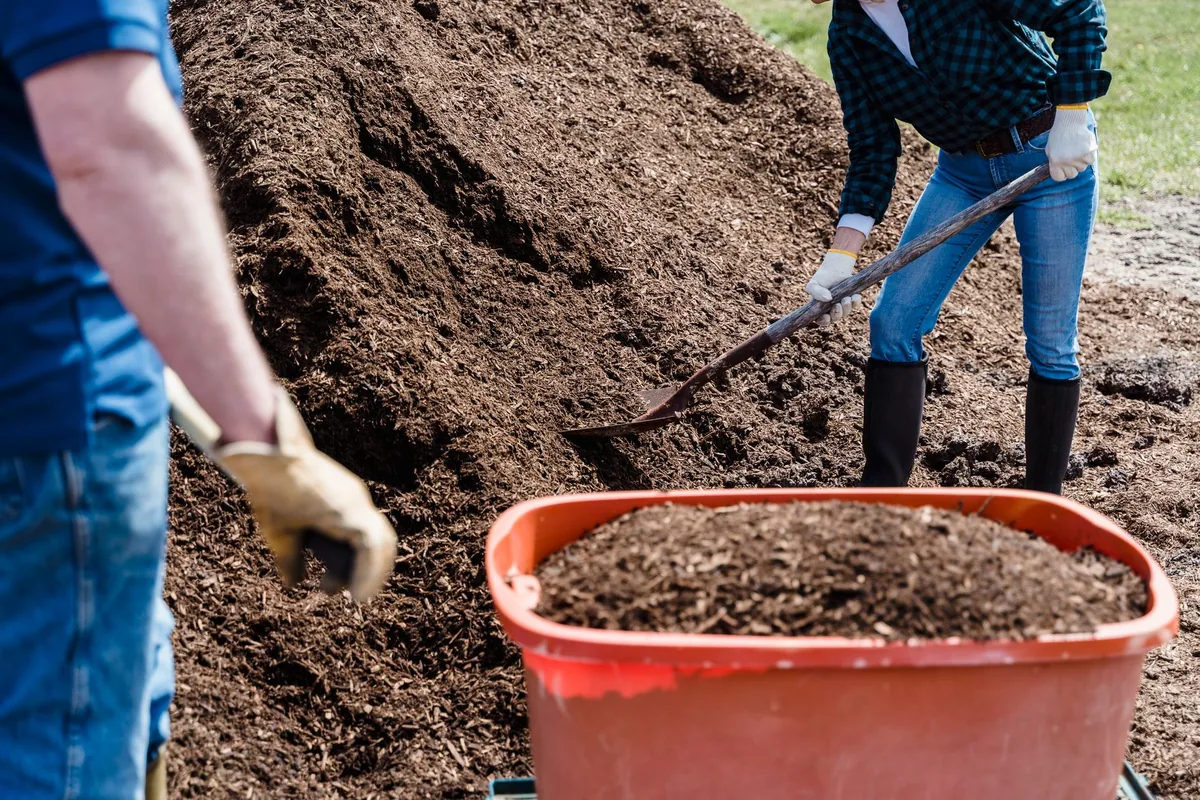
Expect it to settle. Freshly filled beds have little soil structure, and the soil settles as a matter of course. Topping up with a few inches of compost or good topsoil each year should keep up with it. Till a new bed if you need to mix the fill, but not once it is established, because tilling can break down the structure and speed up the settling.
With the bed built and filled, the rest of the yard is next: our patio furniture guide covers seating that stands up to your weather, and more outdoor projects are in patio and garden.
Where these numbers come from
Siting, sizes, materials, liners and soil mixes come from the University of Minnesota, Utah State, University of Missouri, Oregon State and University of Illinois extension pages and the EPA page linked above; lumber sizes from the Southern Pine Inspection Bureau; the post design and screws from a Simpson Strong-Tie plan; and the metal kit details from Vego Garden’s product page and assembly manual, all read on 11 October 2026. The kit price is the one its page showed without a code that day. The cut list, screw counts and soil volumes are our arithmetic.
Frequently asked questions
How deep should a raised garden bed be?
At least 6 to 12 inches for most vegetables, and deeper is better. Two stacked 2x6 boards give 11 inches. Leave the bottom open so roots can reach the soil below; on a patio, where the bed is all the soil the roots get, go deeper than 12 inches, such as a 17-inch metal kit (our reading). Remember that taller beds dry out faster and need more watering.
What is the best wood for a raised garden bed?
Cedar and redwood resist rot and last longer, but cost more. Untreated pine and fir are cheap and break down within a few years. Modern copper-treated lumber labeled for ground contact is an economical, long-lasting choice in one university guide. Two of the guides here advise against old salvaged lumber and railroad ties.
Is pressure-treated wood safe for a vegetable raised bed?
Manufacturers stopped making wood treated with the arsenic-based CCA preservative for homeowner uses in December 2003; the common lumber preservatives now are copper-based. In one four-year Oregon State University study of copper azole beds in the Willamette Valley, soil copper rose only within 1 inch of the boards and the vegetables took up no extra copper. University guides range from 'a plastic barrier should be placed between the lumber and the soil mix' (one) to 'consider' or 'if you are uncertain' (two). If you would rather avoid treated wood, choose cedar or redwood (or metal, our addition).
What do you put in the bottom of a raised garden bed?
Usually nothing: kill the grass, loosen the soil and set the bed on it, because a barrier can stunt roots. Add hardware cloth across the bottom if mice or chipmunks are a problem. On a patio or pavement, a liner water can pass through, such as landscape fabric, not plastic, may help keep the soil in.
How much soil do I need for a 4x8 raised bed?
Multiply length by width in feet by depth in inches, then divide by 12 for cubic feet and by 27 for cubic yards. A 4 by 8 foot bed 11 inches deep holds about 29 cubic feet by its outside size, about 26 inside, so a little over 1 cubic yard leaves some for topping up. A 17-inch-tall 4 by 8 metal bed takes about 45 cubic feet, or 1.7 cubic yards.
- #raised garden bed
- #vegetable gardening
- #DIY garden projects